If you are here to bash and trash, techniques, materials, ideas, or persons,
PLEASE MOVE ON TO THE NEXT BLOG!
Disclaimer
DRY ICE is a extremely cold material. It's temperature is about 110 degrees below zero or 140 degrees below the temperature of ordinary ice. Although it looks somewhat harmless enough, it can do considerable damage to the person that handles it with bare hands. Numbness and pain not only in the fingers but in the hands and arms are the first symptoms. In some cases a form of neuritis is produced. It is recommended you take every precaution possible.
- Avoid all contact with skin and eyes
- Wear Safety Equipment such as Eye protection, and gloves
- Work only in well-ventilated areas
- Never store Dry Ice in tightly sealed containers
- DO NOT leave Dry Ice unattended around children.
I further encourage you to read the DRY ICE association safety page:
http://www.dryiceinfo.com/safe.htm
and the DRY ICE materials safety sheet (MSDS):
http://avogadro.chem.iastate.edu/MSDS/carbon_dioxide_solid.htm
The information provided on this thread is strictly for educational purposes and in no way do the owners and staff of this website encourage these techniques, processes, and/or use of these materials.
I hope no one is offended by the disclaimer and preface, I was on another forum and a person posted a BHO tutorial disclaimer similar to this. Just felt it might be prudent, for myself, and the B-Man, and the website.
To start… this is my first attempt at any type of pictorial… ok then, with that said, here we go…. As I had mentioned in a earlier post…….. myself and a couple friends, Big B. & Louie, from Breaker Brothers Co-Op, had been experimenting with various methods of cold water extraction. Dry Ice, and Co2 being the focus. Some time back, as we were about ready to “whip up some bub” , someone mentioned that it might be a good time to take some photos. So this pictorial idea was born.
While outlining this posting, We decided, I should give some info on the whole process before I start the pictorial… Most important , and something to keep in mind, is that our technique is not based on any known proven method. We have done “dry ice” more than a few times, so “our” method is derived from “trial & error” knowledge gained from those sessions. We welcome all comments, criticism, or collaboration of new ideas or technique that may improve the final product. To those that may also have explored this method, and can aid in the research of this technique, Please share. if you see mistakes, of flaws in equipment, or process, let us know…
“the adventure, is not arriving at the destination, but in the journey to get there………….”
History & Reference:
We have been attempting various methods for awhile, in search of the best cold water method that will “pull” the sticky-est,, gooey-est bubble possible. We are in no way laboratory trained pros. Just a few old guys in a co-op, who get together, talk shit, talk grow, have a good time, and like to try new trippy things. Also as mentioned this pictorial was totally a fluke, it was shot on a 2 mega pixel phone camera. We had no idea if our 2 meg photos would be a good enough to post as a pictorial, so photos may be grainy, and exposure funny, and at times hard to see, but even with all that… the photos, aren’t bad.
Material & Tools:
The dry ice used for this session is the “pellet” type used for industrial cleaning. its kinda the “ammo” for a dry ice sand blaster. Here in California, its sold at ice companies and welding supply warehouses. We have also used the “solid block” type, but have found, that you have to break it into small pieces, anyway. So if pellets are available, get them, and save yourself some work. The cost is approximately a buck ($1.00) a pound.
Some tools will make it easier, such as:
- a Hammer/Pick type tool to break up large icebergs.
- long poker tool such as fire place poker, with a real sharp point, to break up small icebergs
Hazards:
I feel if you do not have extensive experience with the standard ice water extraction method, you may NOT want to attempt using Dry Ice. It’s not easy substance to work with, and when things go wrong, they go wrong fast. So with that in mind……
Working with dry ice has some cautions,
- wear gloves,
- don’t stick your head in the fog and nose hit the mist, you’ll get a headache.
- once water goes in… stay on top of it….. breakin up bergs…. very important keeping them small as possible
Note: As mentioned, we are always trying new ways, on this session we tried a different primary mixing. in the pictorial we do the primary mixing in a “bag stacked” container. This did not work very well! So
please do not mix Dry Ice in your bags. Only due to our being familiar with “Dry Ice” did we manage to keep our cool, which kept the session from getting out of control. Due to the extreme low temps that “dry
ice” causes we literally iceberged through all 8 bags!! a 5 to 6 inch thick screen iceberg! bros talk about “iced!!” We were concerned that the weight of the iceberg, or a pull in the wrong direction would crack the bags or screens!!!! they get that brittle. Hey… you know that, “Phil Nye the Science Guy” type demo, a rose dunked in liquid nitrogen, that he taps on the table and it shattered like glass. Yeah well that's
NOT the kinda “iced” were talking about here, but it does get very, frozen, icy, cold, and ice brittle. So we recommend that the primary mixing be done in a un-bagged container. Then after processing your mix, pour it into your “bag stacked” container. If things start to freeze up fast, and begin to get out of hand, just be calm, don’t pull on, or force things loose. Remember your bags and plastic container will be very frozen and very brittle! Any sharp hard impact could cause the breakage of them. If things freeze up… It will happen fast…and usually freezes big… like the total top 2 inches.. you can not let that happen, or your whole bag and mix will freeze together in one big lump. real bros! Just pour water in the area, kick back, and wait it out. it will thaw eventually……..
Keep those gloves on!!!!!!!!
so enough talking….. on with the photos..
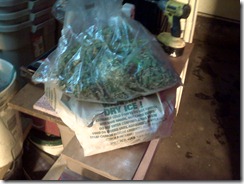
The 200 grams of frozen trim and 5 pounds of Dry Ice.
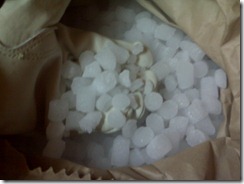
The pellet type dry ice is preferred.
Now were going to start adding the material, we put a layer of regular ice (3 or 4 inches) on the bottom of your primary mixing bucket, this is to keep the trim material off the bottom of the container, were trying to do what we can, to keep the trim material in upper container suspension,, not on the bottom of your can during the mixing stage. So now..

add your trim
We have been running about 200 grams, per 5 lbs of dry ice, to 10 to 15 gallons of water…. whoa now you say 10 - 15 gals? Usually this would be a 5 gal bucket run but due to the bubbling & boiling caused by the Dry Ice we felt that a lot of evaporation was happening during the mixing, and “freeze up” part of the process. Also the reason that were using 20 gallon mixing container (trash can).
Now let me take a second to……

Recognize!!!!

and Represent !!!!!!!!
Before I move on…….. just a little
side bar on BubbleBags,
Speaking for myself, and the true “bubbleheads” here at the Co-Op. We are hard core, “hope-to-die” 20gal bag Boys! In our humble opinion………. if you can afford the 20’s….. go for them. We run every thing in 20’s….. ,I've done small runs of under 100 grams of trim!!!! it makes the process so much easier,
- the 20 gallon container makes mixing easy with no mess, (well, with us, less mess)
- have more screen area, makes for faster draining.
- 20’s pull over a 5gall bucket, which makes the stretching the screen & harvesting a lot easier
- In our humble opinion, they are more durable and longer lasting than 5 gal sacks. (when properly cared for)
Don't you hate running a 5 gal bucket run, and as the ice melts, now you have that 5 gal bucket filled to the top, and or overflowing……. That doesn't happen using 20’s. anyway just still “daytripping” on the bag thing……… back to the process.

So get your gloves on!! In goes the 5 lbs. of Dry Ice, evenly spread over the top of the trim. Now I feel letting it set like this for a few minutes helps flash freeze the trim, some think it don’t matter…. cause once the water hits this…………………. everything goes off, and starts boiling, and freezing …. So anyway lets…

Start adding the water. and the magic begins….

Yeah… that's what were talking about……
Like I mentioned, once you add the water, the show really starts…. it must now not be left alone! Some body has to watch for iceberg formation, which can literally freeze, your mix and container into a giant ice cube! Now this is were the tools mentioned earlier come in handy.. I’m sure you could get away with just using a big stick, but a hammer, and long poker , will make it easier. The tool technique is pretty basic, pound and hammer the Big, Big icebergs into submission, and poke the smaller ones into smaller than golf ball size pieces. Now all the time.. this container of mix, will be hissing, popping fogging, bubbling, and boiling. Do the best you can.

Bubble on…… and a few seconds later….
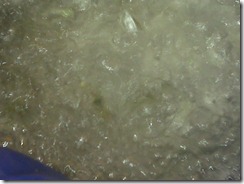
full on rolling cold boil…………..
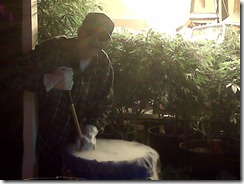
Just putting some “OG backarm” on it…………………. ahh…... I love that low cold fog.
Once all the excitement dies down a bit, and you feel you have a good grasp of what's going on, and the mix is now “managed”, it’s a good time for a…….

“MILK BREAK!!!”

and a little something cold to drink
Check the texture of the mix, in that last photo. now that's what your looking for…. try to keep it that way until you start pulling bags. which is next up. Now some, may want to stir. I stir, hammer, & poke for 10 to 15 minutes, or until the ice gets down to a real small size, say 1/2 to 3/4 inch size then I pull bags. The problem is the mixture is so cold that it stays “iced up”, and this will not allow the trichs to drop to the screen, once the fog production slows down, and starts to clear, I start to get ready to pull bags. Your mixture should be at least 75% liquid before pulling. If you are checking, check your water temp now, . The recommended water temp is
4 ºC, (41 ºF) or lower. Yeah, for those of you that bought one, this is a good time to use that expensive combo PPM/PH/EC/Temp meter. So anyway…

the temp is there, sitting right at
4 ºC .. but i like to keep it moving down….. now’s not the time…. but talking ”whipping sticks”, notice “Big B’s” 2 inch bamboo pole, personally i prefer a thin bamboo 3/4 dia. thin one myself. Doubles as a poker.
Like I mentioned, the technique shown was developed by “trail & error”” So please try what you feel, works for you. You now have mixed and “iced down” the mix. It looks to be liquid enough to pour into our “bag stacked” container. After doing so, we just fall into the Bubbleman’s recommended instructions. We pull the 220 work bag. drain and promptly empty contents into our mixing container, Getting ready for our 2nd run on this same trim. Clean, rinse, and hang 220 bag. Now pull the 190 bag, drain, and stretch over 5 gal. bucket, and scrape off, your yield. Clean the screen off in the mix, rinse and hang. Now there's some that don't use the 190 or 160 bags, and let the 120 bag catch those heads, I've used the technique myself, when my trim has not been up to par, but if your trim is of high quality, you know “the kind-kind”, and your trying for the FMCD (full melt clear dome). I feel that using those higher micron bags (190, 160) only helps to filter, and get that loose particulate out of the mix, so by the time you pull that 90 bag, it is like pure glandular goodness, yeah? Anyway…. that temp should be about low enough now…..
So what????? you want to see some pulled screens!!!!
Damn…I’m slipping…. missed taking a photo of the 190 screen, we usually toss it anyways.. but ..so here’s the

160, grey green “Culinary Grade” paste

120, yeah……. is that creamy for 120 or what?

90, straight plumber’s putty

73, wish I had a better angle that showed the “shine” a little better

45, nice lump of “goo”
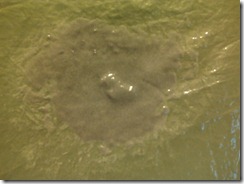
and the 25…. pretty smooth….
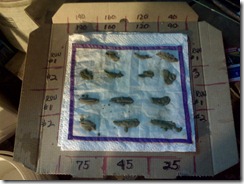
The yield, approx. 16 grams, dry, combined grades. 2 runs on same trim, Hand stirred by a senior citizen (slowly), using a bamboo pole. Real….
Summary on process:
The process is new, and the temp is freezing cold.. which i feel does help in keeping the trichs frozen, which in turn, helps to catch them on the screen. So “the yield”…. In my humble opinion, I feel is “positively” effected. Especially, if you use a frozen base type of setup. where you sit your primary mix container on, or in a freezing type base, which helps to get & keep your temp down, and maintained at that 4 degrees or lower. Look at the photo of me taking a “Milk Break”, notice to the right of me, the container that our trash can sits in, it is filled with regular ice and a couple of handfuls of Dry Ice. and we continue to “stoke it” with dry ice, all through the process. Not only does this help to get us cold but it keeps us cold , but also helps a little at keeping the water splashes off the floor. We think it helps…..
Summary on product:
As for “bag appeal” (looks,) the “color” seems to put a light tanny tone to things, the “texture” is very course in the higher grades, (120 above). “Taste”, is smooth, and after using “Dry Ice” a few times now, I really feel that it’s produced product, seems to retain a stronger, fuller, strain specific, “bouquet”. The smell that lingers in the air is oily, so much so, it’s the scent of hash oil in the air. Now… the big question.. is “Quality” …. in my humble opinion, the product produced by this method is……….. no better, or no worst than any regular cold water ice extracted product, hey but it is fun. The process is a trip to do, that low, dense fog rolling all over, throw on some bumping music… The slushy iced mix that bubbles & hisses. Hey….it’s a great small garage party type activity….
Another thought… after numerous times using this method, the FMCD has eluded us. either by technique, choice of trim, or the properties of the Dry Ice, just does not allow it to clear dome melt (at least not for us) . Now.. don’t get me wrong, We are very happy with the final product, but when melting.. it bubbles amber, melts, and leaves a thin ash of carbon, that can be blown off the screen. the taste is so, so… very .. nice…

My apologies… what can I say….. a 2 mega pixel phone camera, just can’t get the close up shot needed, to show the nice amber dome. You can kinda make it out….
I started playing with this video editor and such…. I just finished editing my first video, It is of the melt confirmation test on the “Dry Ice” extracted product. I don’t know if this is video “insert” is gonna work but I’m trying anyways…... Here it is…
I hope the link worked for those that tried it
I kinda see now, that if I want to continue to explore this pictorial posting thing, I may need to get a camera more suited for it. Any suggestions?
So I hope this was, if not educational, at least interesting, or entertaining to everyone. it’s a lot more work than I thought to put one of these pictorials together, but very enjoyable. I’m already getting new photos together to explore the next method…
Here's a few photos of “Big B.“ from Breaker Bros Co-op setting up the next experimental process, for your upcoming viewing pleasure. Kinda like a episode of Bubble Makers “Myth busters”.


Well……… like I said……. just a few guys throwing it down, in the central coast of California!
So…….., until again….


