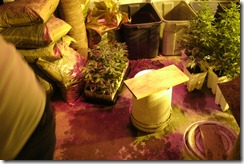
All photos are of legal medical grows, as defined by the State of California, and the county in which they were taken.

FOR BLOG ARCHIVE CURSE DOWN LOWER RIGHT

Monday, December 6, 2010

Just 2 things

I know I haven't posted in awhile, busy time of year for me, the holidays, a few family birthdays and of course it’s harvest time for those of us so fortunate that we can have an outdoor grow happening.

“Abe” came back from the triangle, to the home front, being that he just finished up his outdoor season up north., He had plenty of fresh flowers, of various strains, all very pungent in aroma,

ahhh bros, out comes the GDP….. Headband Kush…… Blue Dream….. here check the Blue Dream out, nice rock hard, full formed flowers, and as always, that Blue Dream aroma…… its just so hard to get this kind of bouquet with indoor.

GEDC2537 Rock Hard Blue Dream

So the first of the two things……… are the new HydroFarm scissors, they call them “HydroFarms Precision Pruners”, with “holster”, they come straight or curved bladed. So when I jumped in to help with the trimming of the homeboy’s labors, I got the chance to give them a real workout. Now I’ve been a “hope to die”, orange buttoned “Fiskars,”  needle point scissors Fan, since I started trimming. The old standby, that most people use, or at least know of.

GEDC2603 HydroFarms PackageGEDC2607

HydroFarm’s Pruners have that classic “Fiskars” shape, but the twist, is they include a holster, which was a nice touch. If you use “Fiskars” , I have and I’m sure their are others like me, that always lose or break that orange release button. The spring and latch assembly are the weak point on that design. HydroFarm has put the latch assembly under the spring, unlike the “Fiskars” which has it above the spring, I sure this was done to stop that Orange button problem. Anyway I cant speak for the strength or design of the belt loop attachment, on the HydroFarms holster/sheath, as I don’t wear them, like that…. but it looks hefty enough.

GEDC2604

So after….. oh I’d say……. around 4 or 5 lbs., of various strains, trimmed up. I can say that they held up well, I prefer a straight blade, but I was using both curved and straight to form a opinion on both, both curved and straight bladed models were nice and balanced.

The curved model was great for those “pine cone” shaped flowers, It may have to much curve for my liking, but others may find it acceptable. Now if you have those “bumble bee stung, bumpy type” flowers, the curved blade may not be the best choice. Also I found that cleaning the curved blade was somewhat difficult but not impossible. It was hard to get a really good scrape in there. All in all though I found them to be an outstanding tool, the price at around 10 bucks retail, was right in the ballpark, and the holster alone would make me want to recommend this HydroFarm product.  Of course….. I’d go straight bladed…… myself

GEDC2612

So now the second of my two things…. 4 me there isn't nothing like a trimming flowers for a few 3 or 4 hours and then taking a break and having a puff, nice warm drink, and a little sugar… Bros.. have you checked out the new Betty Crocker “Warm Delights Hot Fudge Brownie”

GEDC2589 comes with the bowl , the everything is included. Hey if your into warm chocolate than you have to try these….. two (02) tablespoons of water…. whip it and then 45 seconds in the microwave…… 45 seconds……

GEDC2614  then drip this fudge all over it…. Dang…….good.. then chased with a Cadillac coffee…  Dammmmmmmm

Friends….  huh…. eating, drinking, and smelling the aroma of Blue Dream, adrift in the air…. Heaven Bros….straight Heaven…… In Santa Cruz, CA…

I want to say that the homie “Abe” is the sheezit…. for letting me trim through his “labors” in testing the HydroFarm  product. All his strains had outstanding aroma, with good flower formation. The HeadBand Kush was a little leafy, and a bitch to trim (just being honest, Homie) it made up for it in bouquet, and High though..

GEDC2590GEDC2592  uoo-wee.. I gotta pee…

GEDC2539  real Grand-Daddy Purps (nice tint…. yeah!)

GEDC2601just one of manyGEDC2598

So until again……….

Wednesday, November 24, 2010

Happy Thanksgiving


U bring the turkey………

I’ll bring the turkey bags!!!

GEDC2532

Monday, November 15, 2010

Aqua Lab’s 420 Bags


The 420 Bags distributed by AquaLab Technologies come complete

IMG00161     with the drying screen, and a black storage sack.

   IMG00163_2     420 Bags are made of industrial strength, medical grade, water proof nylon. They are sewn with parachute stitching, Every seam is also taped on the open side, definitely quality workman ship and materials.IMG00170IMG00162_2   420 Bags are one of the companies out there doing that mesh screen sidewalls thing. 420’s sidewalls are 2 inches high, The claim is….. that it makes for quicker draining, less stress and longer life. In any case they (sidewalls) are very well done. They guarantee true mesh sizes, all seams are tight…… the workmanship on these sacks is very good.  Made in the U.S.A.  . . .   Hoo-Ra

IMG00159IMG00157  The 420 Bags are color coded and micron mesh size labeled on the side of each bag

They also have a drawstring, and metal grommets, a very nice touch on the 5 Gal and up bag sizes.  On top of all that they carry a full 1 year warranty. 

That’s all fine and dandy but how’d they work????

Well let me tell you about it. On getting the bags from AquaLabs I was excited,  I’m a “hope 2 die”  OB (Original BubbleBag), from back n da day when that’s all there was….. was Bubble Bags. Anyway….Being I’m not any one special… I buy the items I review. So on 4-20-2010, AquaLabs ran a 420 sale. I saw these 8 bag sets so I thought what the heck, now is a good time to try these 420 Bags , 8 bag set for under a yard... I was also lucky I bought the 1 Gal bucket, cause you do need one. I looked locally I have yet to find one in the places I did look. So anyway I had a couple Oz's of some Blue Dream trim with some “Larf” in there also.  So off I went to do a quick  run. 

Theses bags have very thick upper bag so its easy to roll them up like shirt sleeves and stack em on top of each other, that’s the way I do it,  I  rolled them down till the screen siding started, then stack em in order, it works great.

GEDC0469    The stiff upper bag helps to keep standing up for a nice dry out after use.

During the first run I noticed my 20 micron bag would not catch anything. Now in my experience the 25 micron  bag will always SHOW SOME COLOR. So upon a closer look with a magnifying glass, I found that the 20 micron and 45 micron bags had somehow been mislabeled. I contacted AquaLabs and they were more than happy to send out a new bag. Outstanding customer service by AquaLabs.

Don’t know if you caught my comment on the 20 micron bag. That’s rite, 420 Bags use a 20 mic bag where BubbleBags use 25 mic bag. Something I just became aware of. I  agree with those who feel the 25 mic bag catches only the broken and smashed heads, broken “trich” stems and fine particulate.  The money (FMCD) is somewhere  between the 43mic to 90 mic area in my opinion.

IMG00158   As for the 2 inch screen sidewall, I found that at this size the one (01) gallon bags that during the draining that the flow was from dead center bottom with little to none coming from the sides. Now in the 5 gal or 20n gal size it may be a different story. I don't think the 1 gal  have enough volume to get it to flow out the sides. The draw strings are worthless, in my opinion, but the brass grommets would be very helpful at the 5 and 20 gal sizes….. for sure.

GEDC2490  Where I found the biggest difference was in harvesting the “trichs” off the screen. Now I use the “drum bowl” method. insert a bowl smaller than your bag screen and pull tight into a drum head, then with credit card, spoon, putty knife, or your tongue…. scrape it off and deposit in a nice pile on drying screen or it’s equal. All the seams from the sidewalls make the screen a bit stiff, and unruly, you have to pay attention to the seams and the bowl edge, but after one or two “try's”, it’s not no biggie,

All in all I found the 420 Bags to be very well made, easy to use and clean. As for the 2 inch sidewalls, as I  mentioned at this size (1gal) they did not seem to work, but did not hurt either. They produced a good yield, and I wish I would have not gotten side tracked or I’d have some puffing photos of the yield. ahh next time.


Thursday, November 4, 2010

Pressed Balls . . .

Pressing..  now here “at the Dog Pound” pressing really doesn’t mean “pressing”. . .  Let me lay down more foundation. we don’t press the usual way.. by heat and pressure,  Most people, heat it to soften, then press it by squeezing, with rolling pin, car jack, or twist screw….well we do squeeze sort of, but kinda low impact.

We start by weighing out one (01) gram units of any Bubble, or Dry Sieve powder that we have deemed worthy of this process. Once that is done, we have these pieces of 3 inch by 3 inch squares of cut t shirt or boxer shorts. High end material that has some type elastic pull to it.  Deposit the Bubble powder dead center. then work and pull it into a ball,

Now some like to use “dry heat” in which case…. just lay it on a heater for 10 or 15 minutes. Now I like to drop mine in boiling water for about 5 seconds then let it dry. whatever the case I DO NOT squeeze or press the ball. I have…. but I feel  it changes the hash. Oh don’t get me wrong… it still does what God intended it to do, but the smoke is a more, deeper, hardy type. I like the lighter smoke that is produced by not touching the ball  until ready. I let the natural pull of the elastic clothe pull the powder together…. it produces such a nice tight ball, with a firm case hardened exterior, and a soft light fragrant interior, with the texture of warm brie …. that is a joy to cut open….. yeah man….

and if you can manage to keep a jar full of em, curing for a few months

GEDC1523  once pulled into a ball, we use bread or plant ties to wrap the ball up tight as in the photo.

GEDC1522  and Viola….

GEDC1505       a nice little line of one gram balls  

GEDC1517  nice looking…. yeah

    GEDC1852     can u smell that?    Whoa….

GEDC1847 GEDC1843        Or slice it off in slabs like a bread loaf.

GEDC1553

Personally I heat it prior to putting it in the bowl I just hold a flame up to the ball, finger, patty, or whatever shape. hold the hash over a flame, Then once it warms,I scratch, or rub till it falls off the ball, in a fluffy pile, or rite into the bowl.  I think you‘ll find it’s also a smoother smoke this way.

I'm hoping to wrap em a few handfuls up in foil like this

GEDC2466

GEDC2457  and give em away for Xmas….. Canna Kisses.

Thursday, October 28, 2010

Chore Boy ….

Now this may be a poor subject for some…the use of “Chore Boy” as a smoking aid. But here at the Dog Pound we are always looking for a better way.. So I myself smoke BHO from time to time. Now I’m not here to debate the pros and con’s of BHO’s use. I'm here to show you how I smoke it. Which I feel is one of the safest,  most efficient ways, popping (of doing it) right now.

For those that have not been put up on “Chore Boy” the brass wool pot scrubbing tool. as a smoking aid then your parents may have done a fairly good job.

Well I’m an old OG so my history is kinda thick… but “back in the day” I learned this way of smoking various oils, with the help of a hunk of “Chore Boy”. of course it has that negative shadow of “CRACK’ cocaine… all around it. Even now.. as you read this… some may be turned off by it. But I’m here to tell you.. done right and you will really see what puffing Full Melt and/or hash oil is really about. Throw all the Ti plates, curved bells, skillets, nails …… in the drawer.    Let me show you how we puff it here in California.. at the Dog Pound…..

but first …

The information provided on this thread is strictly for educational purposes and in no way do the owners and staff of this website encourage these techniques, processes, and/or use of these materials.

We also encourage that you search out more information on the subjects covered, until you have a good understanding of materials, techniques, and the safety of processing and handling of these. Safety is paramount

Of course my standard preface:

If you are here to bash and/or trash,  techniques, materials, ideas, or persons, PLEASE MOVE ON TO THE NEXT BLOG!


GEDC2441Now.. I tend to use the “Chore Boy” brand, but there are other brands that work out there.

GEDC0149 I get a small loose ball together about 3/4 the size of the bowl I’m usingGEDC0186  I then open it up, flatten it out, and burn off the varnish or what ever the finish that keeps the steel wool nice and brite. So with a torch I burn it off real good..  GEDC0189  Burn it real proper.. different angles, keep the flame moving, then rub it out.. to get off any burnt dust, or debris out of the nest.. 

 GEDC1024 then based on bowl size.. make a loose to medium density “birds nest” is the best I can describe it.GEDC0203Now you  might want to try pulling it apart by hand, to get the size you want, 

 GEDC1406just cut it with scissors, it’s neater, and easier.GEDC1419Just drop it on in there

 GEDC1410  This BHO I have right now has done cured into a solid, with a very low melting point. probably around 95 to 96 degrees.

 GEDC1408starts melting to your touch. It gets sticky real quick, all over your knife, table, hands…

GEDC1412    Now you can do it how you please… But i find it easier to get the oil or Full Melt, in the wool by taking it out of the bowl for better control and ease.

  GEDC1413I wipe a good ole spot in the center of the “nest”

GEDC1414Drop it back in place

GEDC1417 grab my torch and get ready

Image00002to canna-itate on that Monterey Bay sunrise…


Technorati Tags: ,,,

Sunday, October 24, 2010

Pollen Press

Just thought I let anyone that cares about pressing, that there is a decent deal out there on presses. Amazon has these on their site

for $15 bucks hey can you really go wrong? ' target=_blank>“Click Here” to check em out…. yeah 15 bucks

Saturday, October 16, 2010

Hydro Flush Process

   As always. . . here at the Breaker Bros Co-op we are looking for the better way. So when one of the bros, “Big B” aka “the Youngster”, or “The Onion”, to me he’ll just always be the “The Kid”. Anyway, I feel he’s the next up and coming threat, for the title of “Indoor King of California”, told me about his new R&D  project. So with the invite to watch first hand, I grabbed my good old GEA950 camera (9 megapixels for 40 bucks @ Best Buy, check my blog for the review) anyway oh yeah… and off I went to the Breaker Bros Indoor Compound.

Well the theory, goes pretty like this. after you freeze them, you knock them off, you let em sink, you collect them. . . trichomes were talking…. So Big B. decided one day how about forcing them off with a pressure washer. . . . how he came to this idea???? He tells me he was kicking it with the fellas from Mean Green Delivery & Collective, who just recently opened their delivery service for us, Medical Card carrying people. Anyway they were talking, and came up with the idea of Hydro Flushing,  I know, I know, but before you start. . . . just check the photos, cause I was skeptical myself. So lets look at some photos…… this is a good place to mention…..

The Disclaimer.

The information provided on this thread is strictly for educational purposes and in no way do the owners and staff of this website encourage these techniques, processes, and/or use of these materials.

We also encourage that you search out more information on the subjects covered, until you have a good understanding of materials, techniques, and the safety of processing and handling of these. Safety is paramount

and of course… my standard preface:

If you are here… to bash and trash,  techniques, materials, ideas, or persons, PLEASE MOVE ON TO THE NEXT BLOG!

First off, the power for this hydro flush process is our Ryobi RB800 Pressure Washer, 7 HP, Gas Driven. If you have seen my web page you will know we use this piece of equipment for other garden maintenance, and preventive maintenance procedures. I can not stress enough the use of proper safety and ecological procedures.

The use of the pressure washer is not to be taken lightly.  If your hand or finger are hit by the high power water stream from the tip, can cause serious skin and muscle damage. I recommend that you read your equipments, owners manual, or go to their web site as. Again safety is of the highest priority.

As you see, ours is not the newest, but it does do it’s job,including as you will see, flush a few trichomes into some screens….
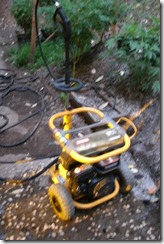
GEDC0828   Isn't much to look at but… it does put out. 

 GEDC2200As I stepped in to our, ” R & D Complex” (Garage), I was noticed, two (02) 32 gallon Garbage Containers on top of a piece of 3/4 plywood supported on top on our 55 gallon RO water reservoir. Very Interesting … Have a look below . . . That’s Big B, doing the “funky chicken” dance, while filling the upper 32 gallon can with a little ice.

GEDC0862 Notice that there are two (02) containers one in the other. well he has drilled numerous (One hundred +) 1/8 inch holes with a few 1/2 inch ones for good measure, in the bottom of the upper container sort of a king size kitchen colander. Now his thinking was only the outer edge was indented at a lower position, so he only drilled that area, as he felt most of the flow would be to this lower ringed area, I concur, but still may have drilled the whole bottom somewhat.

GEDC2166 the one on the bottom he has inserted a 2 inch gate valve at the bottom, which he then added a 90 degree turn, pointing in the down direction. Like so…

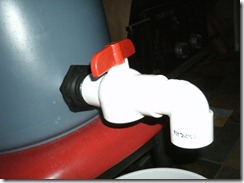
GEDC0808 GEDC2165

Hope you can see…

That Gate valve dumps into a another 32 gallon can stacked with our standard 20 gallon Bubblebag Setup. Now he is using the 20’s here, with no ice-bed around the receiving container/Bubble bag stack.. As we usually do.

.GEDC0809 Here's a look at the whole setup.

After some thought Big B realized that He’d still have some “particulate” get by… being that the drilled top container was not screened..

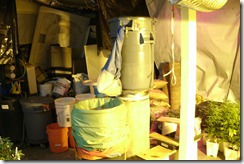
 GEDC0846                            GEDC0806he decided to just wrap a bag around the 2 inch gate valve.  (Notice our nail polish patch job on the 20 Gal work bag)
         GEDC0812          GEDC0811So w

now we start loading the Ice and Material.  In goes the ice… bout 9 to 10 lbs to start, the material is in great shape… kept frozen for 2 or 3 weeks, All Strain specific (Blue Dream……Oh the bouquet). Looks like he put little over 2 lbs, for this first run.

GEDC0870  GEDC0855 GEDC0859   NO WATER….. repeat .. NO WATER…..We toss it like a big salad… get the ice well distributed, and let it get it’s chill on, for a bit. Now Big B, in the mean time, started warming up the pressure washer (gas driven.. don’t u know….), puts on the “standard” tip or, “general use” tip. Now you can use any tip you choose,  just be aware, and keep hands out of the line of that water jet stream.
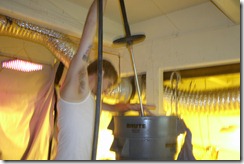
GEDC0863So Big B gets the wand in the can and gets to “spraying it down” proper.

GEDC0864So after a good spray (of about 10 gal by volume) we let it sit, and “freeze up” a little, bout 30 to 40 minutes.

 GEDC0866

 GEDC0871Well my bad….maybe a little more than 10 gallons of water… As you can see, He uses the spray wane as his “stirring stick”,

  GEDC0873

GEDC0848As it sits, he gets the bag stack together     

IMG00180Yeah man !!!!!!

 GEDC0884Hold it now!!!!!  watch your back step….. Had to use some of the  transplant area to set up this ” Run”. Now it’s seems to be about the proper time got nice frost on the sides of our trash cans. the meter sezs its a good 4 degrees C…

 IMG00177

 GEDC0874He decides to open the valve…….. and here it comes. At the same time he's up top with the water wand washing the trichs rite off the material……….

GEDC0876Yeah I know….. Screw all the dumb shit……… lets pull some sacks… RITE

GEDC0849

Check this is this “a hunk, a hunk, of burning love” or what….

GEDC0918 So basically.. we pulled the sacks accordingly, Now Big B tries to stay current on the latest techniques. So he shows me this new “twist grind” thing with the drying screen. It seems to work real …as you can judge yourself.

You just drop your blob in the center of your drying screen and twist it up in a strawberry, wring it out, then after you’ve done that a time or two… you literally, “rub it out” of the screen in small clumps, onto a plate or a drying surface.  So you be the judge, here's what it looked like.

GEDC0887   As I mentioned we (Breaker Bros Co-op) are currently kinda tight on room. Looks like we will be looking for a new spot. As are lease on the grow is up and not looking good for a renewal. If ANY ONE KNOWS  of a spot for rent please contact us. Any way      

GEDC0912Big B using our Veg tray drops that 90 blob in the center of the screen.  

GEDC0913starts working it to the middle and into a ball shape

GEDC0911GEDC0914

GEDC0900  

GEDC0895 Now pulling it into a tight strawberry

GEDC0896 And wring out excess water

GEDC0897 GEDC0898 Rub it up and out onto paper shop towels, or sham-wow  into small  clumps

    GEDC0821

When still moist we jar it and from there we can go in any direction of extract form we choose, (Melt, pressed, butter, traditional hash, temple balls,etc.)

GEDC0813

GEDC0814

It wasn’t to bad a yield at all.


GEDC0815

GEDC0819

GEDC0820

So i hope this was at least interesting to those of you that like to explore different processes, as well as techniques.

personally I think you can get away with using one of those inexpensive small garage pressure washers, the wall plug type. might even be more effective.

So until again